Last Updated on February 23, 2022
In this article you will learn exactly how to start streaming on Twitch, without any prior technical knowledge.
Create a Twitch account for live streaming
The first thing you need to do in order to start live streaming is obviously creating a Twitch account.
Step 1
Go to twitch.tv
Step 2
Click on the purple “Sign Up” at the top right of the site.
Step 3
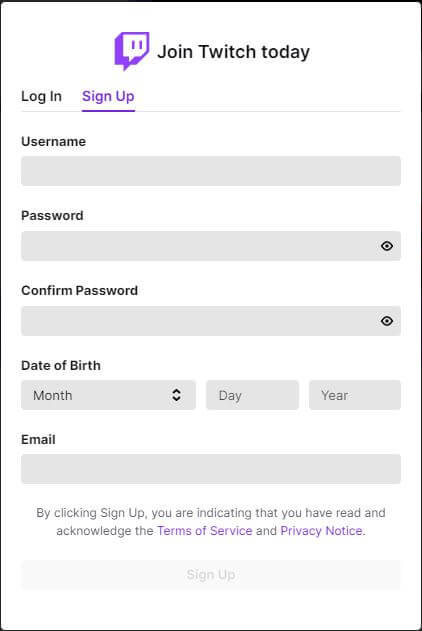
A new popup page would open with the following fields:
Step 3
A new popup page would open with the following fields:

Step 4
Fill all the necessary details, including Twitch name, password, your birthday and email address.
Step 5
Verify your email address to activate your account.
Setting up a streaming software
In order to broadcast on Twitch from a desktop computer, you need to use a streaming / broadcasting software. The main benefits of those types of software are the ease of use and affordability they provide for new streamers.
Each streaming software has its own set of pros and cons. The most popular options in the market currently are:
- OBS Studio — A free, open-source streaming software with built-in Twitch compatibility features. Tends to be the go-to solution for new streamers.
- Streamlabs OBS — Streamlabs is one of the biggest online streaming software companies, and their own version of OBS would give you access to a few additional features
- XSplit — Another software solution for broadcasters who are willing to pay for additional features and better support.
All of the software mentioned above would work with Twitch. For the purpose of this article, we would use OBS Studio.
Step 1
Download OBS Studio
Step 2
Install it by the following automatic instructions.
Step 3
Open OBS, click on “Tools” and then “Auto-Configuration Wizard”.
Step 4
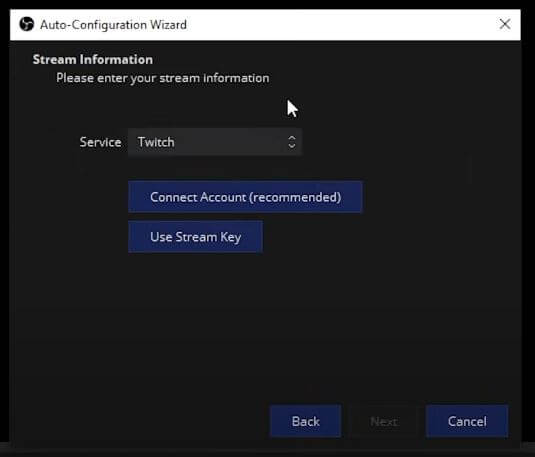
In the Auto-Configuration Wizard, follow the optimal instructions until the “Stream Information page”:

Step 5
On this page, choose Twitch on the “Service” dropdown menu and then click on “Connect Account”.
Step 6
Enter your Twitch account and authorize OBS Studio to connect to your account.
Step 7
Continue with the “Auto-Configuration Wizard” and allow OBS to test your setup.
Step 8
Click on “Apply Settings”.
After following those instructions, you should now be able to see your chat tab, as well as your initial streaming setup
Adding A Capture Source And Going Live
Step 1
click on the plus sign at the bottom left corner of the OBS software to add a new scene.
Step 2
Name your default scene (you can set any name you want).
Step 3
Click on the plus sign in the “Sources” tab at the bottom of the screen. It would give you the option to set up a new streaming source.
Step 4
Choose “Display Capture”, “Create new” and then “OK”.
Step 5
Repeat the process of adding a new source but this time choose “Audio Input Capture” to set up your microphone with your stream.
Step 6
Look into the Audio Mixer” bar at the bottom of the screen to ensure your audio setup is not too loud. You can control your microphone’s volume from there.
Step 7
If you want to add your webcam to the stream setup, repeat the process of adding a new source but this time choose “Video Capture Capture” to add your webcam to the live stream.
Step 8
That’s it! You are ready to go live. Simply click on the “Start streaming” button at the right side of your screen and you’d go live on your connected Twitch channel.